Playing with filters.
As part of my “rationalization” for justifying buying the Q2MR (sounds almost like . . . R2D2, C3PO) was that it was going to force me to bring back a bit more craft to my photography given that it records only in black and white. One of the key aspects of that involves filters, namely colored filters. Put a yellow filter in front of a normal sensor (or color film), and every picture you make will be . . . well, yellow! But on a black and white sensor (or film), well, the sky might turn a bit darker, which makes the clouds stand out a bit more. The petals of a yellow rose may turn near-white. Color filters play a large role in one’s ability to control tonal values in black and white images at the time the photograph is made.
When I was shooting 4x5 black and white film, I had a pack of colored filters that I was very attentive in using. Of course there was my basic polarizer filter that does things with light that cannot be produced after the fact (like eliminate glare from non-metallic reflective surfaces - read: water), and also have the advantage of darkening skies . . . in some instances. Polarizers work for both color and black and white images. But I also had yellow, orange, red and green filters. For landscape photographers the yellow, orange and red filters (well, the orange less so) are staples - they darken the sky. If you’ve ever seen a black and white print from film where a “blue” sky looks almost black and the rest of the image looks normal, it’s worth putting your money down to bet that it was photographed with a red filter. For me, it’s often a bit too much, which is why I often like to use the orange to be a bit less dramatic. The yellow filter has the least effect, but in some ways is essential. On days where there is a light blue sky and faint cirrus clouds, sometimes black and white film (and sensors I guess) have a difficult time differentiating between the two (very different colors, but tonally almost identical). In those instances, you need a yellow filter to darken the sky just a bit, which brings out the wispy clouds the way the eye sees them. Put another way, the yellow filter will sometimes help a black and white image look normal. (Some early films could not record blue at all, so you’ll see very old photographs where the skies look white.)
Recently my first order of filters arrived and I had to take a quick 10-minute photography . . . I mean coffee-break from work to test them out. My plan was to get the same set of filters I’d previously used, and since I already had a 49mm B+W polarizing filter, all I had to do was focus on the colored filters. Unfortunately, my usual go-to shops in Europe were missing the orange and green filters, so I had to start with the yellow and red, which is what arrived in the mail.
I basically made the same image using each of the filters to see how they differed. Given that the exposure can vary ever so slightly each time a hand held image is made, I decided to adjust the tonal values for the second bright wall from the upper left to be the same in each of the images so you can see the effective differences between the straight image versus the ones with the filters.
We had a fairly nice day with a slight bit of haze on the horizon. On the straight image below you can see how, towards the horizon, the differentiation between the hazy blue(ish) sky and the clouds are not as distinct as the clouds higher up or off to the right. Everything else is tonally separated with no manipulations added.

The yellow filter darkened the blue skies a bit so that if you look towards the horizon, those clouds stand-out more (because the background has been darkened a bit) than they did in the straight image.
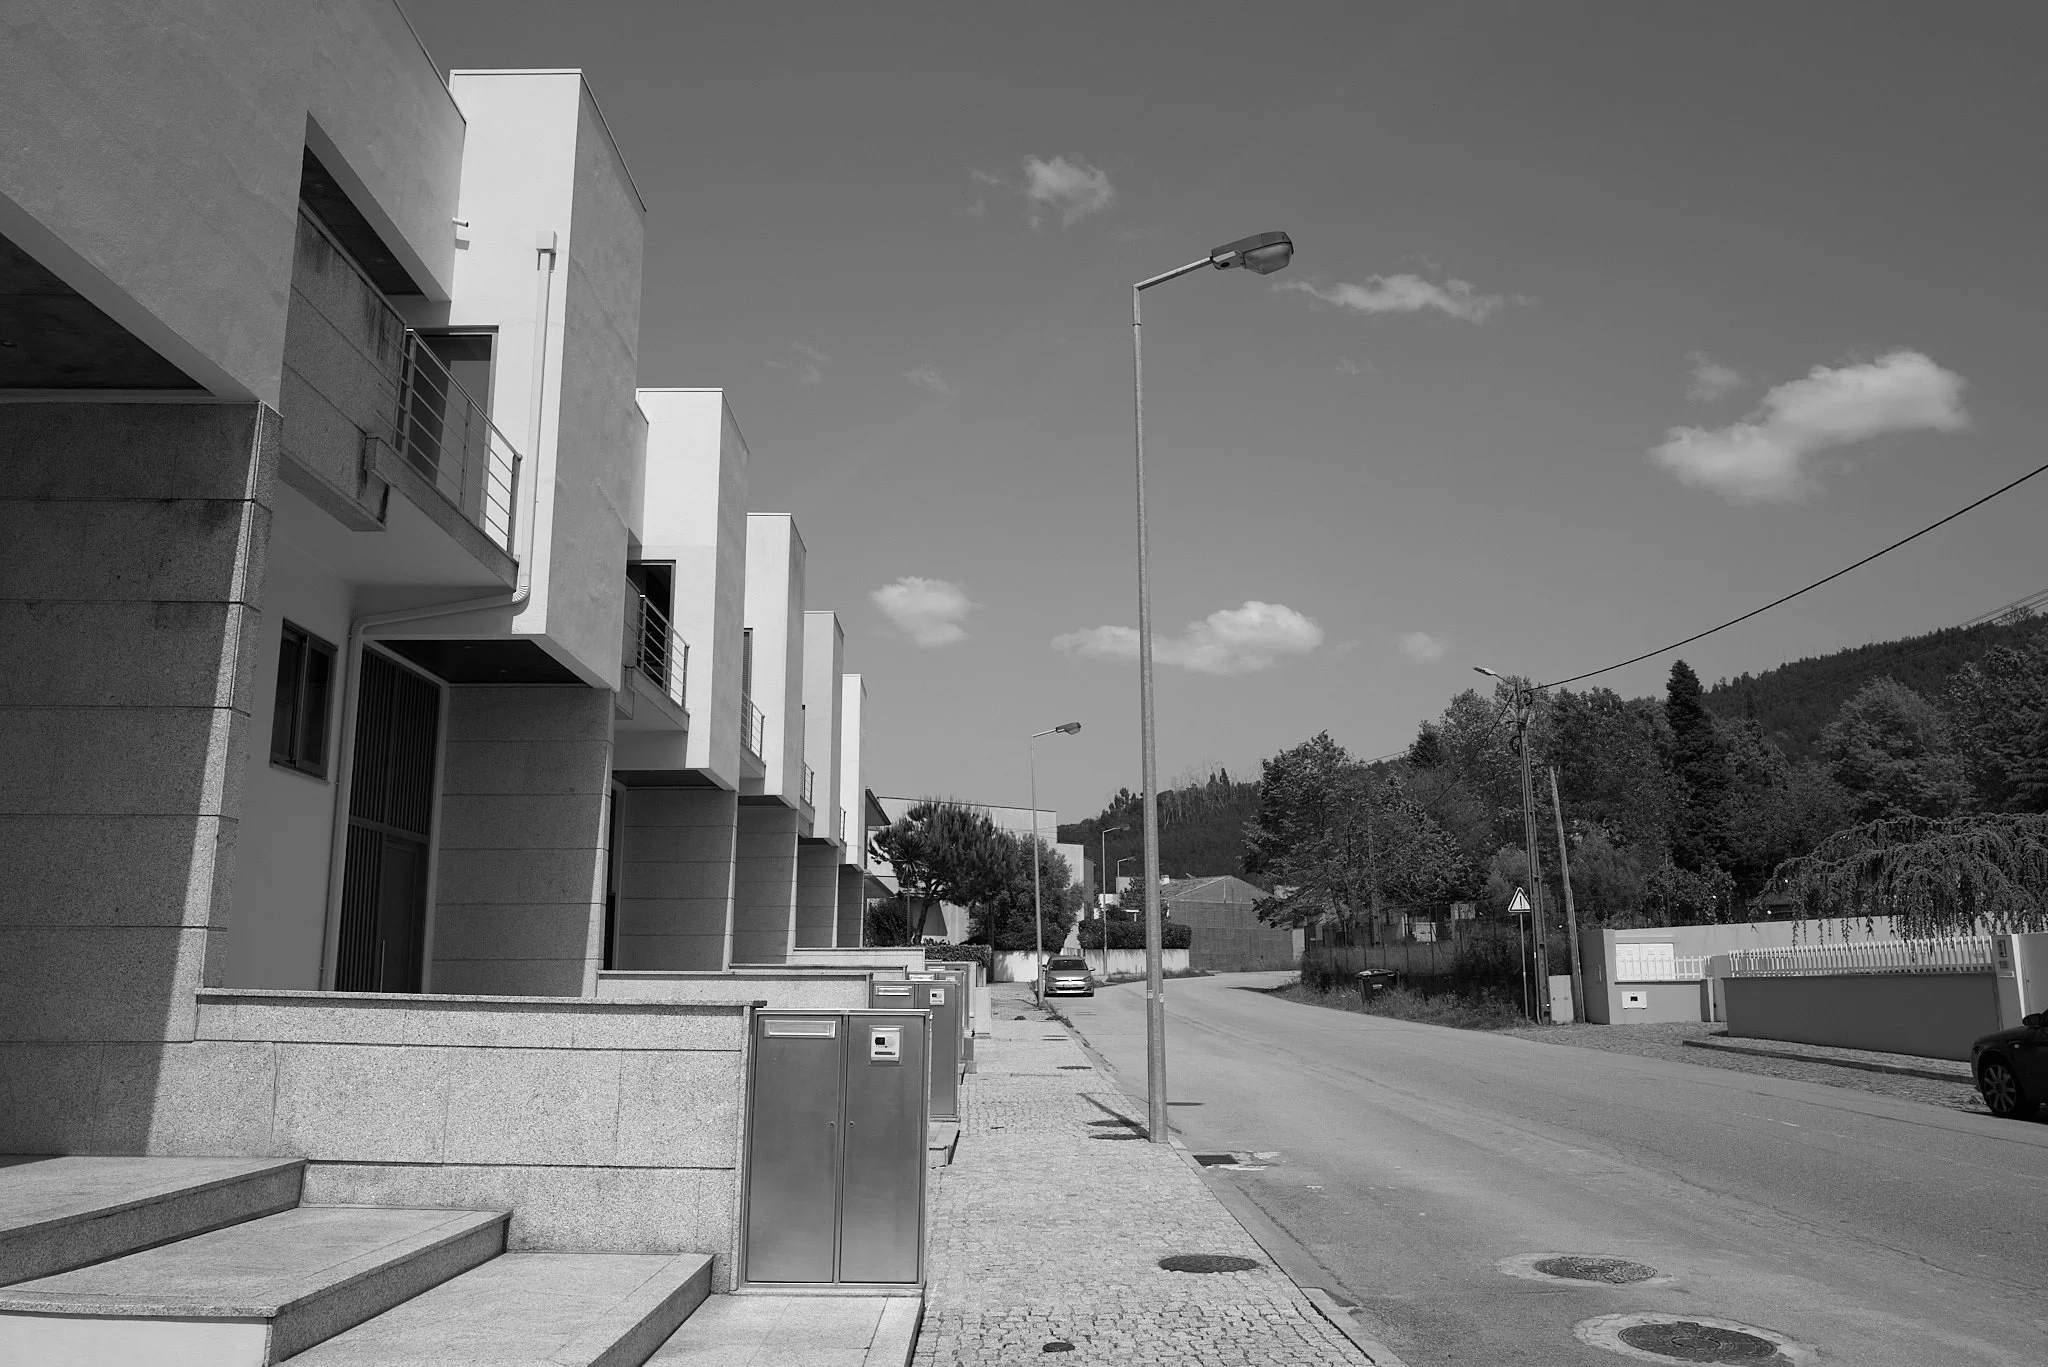
Sometimes just testing something in particular (like what the effect each filter will do to the sky) leads you to see other things (or remind me of other issues in this case), which makes the test all the more worth doing. Here, I was reminded that not only will the sky be darkened, but other tonal relationships will be changed by the filter. In some ways it’s as simple as remembering that a filter will lighten its own color and darken its complementary color. What I was reminded of by this series of images is that most colors are a combination of primary colors and the filters used for black and white tonal adjustments will affect those mixed colors as well.
Face it, yellow and blue make green. So what does a yellow filter (or a red or orange filter) do with green foliage? Lighten the yellow component? Darken the blue component? That’s much harder to predict than it is to see. If you compare the above two images, it looks like the straight out of camera image has a bit darker foliage, but if you look carefully, some of the trees are the same. What it boils down to is that the foliage just comes out differently. It appears that the yellow filter helps distinguish the trees a bit better . . . but that is the case only for this mix of trees. The same might not be true for different trees in other landscapes. Now the exercise became one of looking at the sky and the trees to see what happens.
Next up was the red filter image. As one would expect, the skies became even a bit more darker, which adds an overall visual contrast to the image (recall, the brightest part of the image is the same on all three photographs). Given we had hazy skies (it appears we traded one town that was subject to inversion layers (Eugene-Springfield) for another (Braga)), the sky was never going to approach that near-black look that a red filter can give, but the upper edge of the frame hints at what could happen with this filter on a really clear day. And of course, the clouds are very apparent in this image, which is the reason this (and the yellow and orange) filter is so essential for landscape photographers.
Looking at the foliage, it’s clearly much deeper than with the yellow filter image. That’s because most of the time there is little red in trees (yes, but wait until fall!) so there is nothing to be lightened by the red in the filter (unlike the yellow component of green in green leaves). That leaves the darkening of the blue component in green, thus the generally darker foliage with very little tonal separation between trees.

Thinking about the color in subjects and how they might play out with colored filters on a black and white sensor also reminded me that indirect light is generally bluish (that’s why our skies are “blue” and there are different digital camera white balance settings for “daylight” and “shadow”). All this means that with the red filter areas in shadow will also tend to be rendered in darker tones than in straight-out-of camera images. Potentially not a good thing if you want to show both clouds in the skies and details in heavily shadowed areas. That’s a good point to remember!
As a quick, 10-minute coffee break from work (plus the time spent analyzing the images and writing the blog post), this was a very productive exercise. This is going to be an interesting journey.