Developing Images
A couple of weeks ago, on one of my writing breaks, I walked up the stairs to check out what Ann was doing. On her monitor was an image she was working on and we started talking about the developing process. From that chance encounter we’ve since periodically talked about developing images so I figured it’s about time to put my (read: our) thoughts down in words and to share them with you.
Probably the best part of this isn’t that the post reflects those shared discussions (though not as much as I’d thought [written after the fact]), it’s the fact that I’ll be using one of Ann’s images as an example. In fact, it’s the image that was up on Ann’s monitor.
Now I’ve mentioned before that I use the term “developing” an image for the work I do with the image on the computer, well after I’ve made the image with my camera. You might call it a retro-reference to the old days of wet darkrooms (I can’t deny that, because that’s where [should I say “when”?) I fell in love with the medium), but I’ve always had a difficult time with the words “capture” for making an image in the camera (the exposure process), and “post processing” for developing the image even further on the computer. Those are terms that arose during the early days of digital photography and many still use them. But they bug me for any number of reasons (probably best not to go into all of them right now . . but I can’t help myself, so I’ll just touch a toe into the water).
I understand that those terms have some technical meaning. For example, some cameras will count the number of “captures” made by the shutter. Which is useful for professional work when the lifespan of a shutter might be 500,000 “captures” and a photographer might want to know she should replace the camera before it fails on her during the middle of a paid assignment (or at least have a good backup ready). But transferring that term to the creative process seems to me a bit odd. I’m making images, not capturing them. Granted, someone like Henri Cartier-Bresson indeed spoke like he was on the hunt, looking to capture images, but that is an entirely different creative process and ties to a mentality that does not permeate most of my photography. And while I can embrace the photojournalist adage of “f8 and be there!” (at 5:27 am in pre-dawn light for example), I still have a lot to do to make the image I’m seeing and feeling at the time.
Perhaps the best description of this idea of developing the images you made with your camera out in the field came from a recent YouTube video we watched where the speaker made a simple point about how important that development process is. As he framed it - a full 1/3 of the Ansel Adams classics is dedicated to the Print (the books are The Camera, The Negative and The Print - the latter two forming my bible about the technical aspects of the photographic process in the wet darkroom). Granted, digital photography has an intermediary step/potential final product that the wet darkroom didn’t - the ability to show an image on a monitor - but the concept is the same. How do you go from a recorded image (negatives or 1s and 0s in a digital file) to a form that others can see (a print or an image on a monitor screen [and hopefully into a print form as well]). The point is that the developing of the image is not “post-“ anything. It’s an essential part of the process. Until you do that, you pretty much don’t have anything for anyone to see. Indeed, next to “seeing” the image (or the possibility of an image and then composing it within the frame), the development phase is often more creative than the exposure phase. [Thank god I don’t have a lot of readers - that last sentence would probably start an online civil war!].
Let me explain, again drawing from the wet-darkroom days. The purpose of the exposure end of things is to collect [ok, I’ll use the word - capture] the maximum amount of usable information as possible on the storage medium, whether it’s a negative or an SD card, to give you the maximum flexibility for when you’re reproducing an image (whether on paper or on a monitor). If you drastically underexpose - areas go black with no details at all, and you can’t get that back. Same with radical overexpose - areas go white without detail, and you can’t get that back. If your “negative” contains details in the very darkest of areas or in the brightest of highlights, you can always “develop” the image so that they go pure black or pure white, or you can “develop” the image with subtle details in the shadows and/or in the bright-lit clouds. The aesthetic choice of what to do now lies in your hand, not on exposure error. That’s in large part why computers are now put into cameras - they help people get a usable exposure (and often one that doesn’t really need to be developed before it can be shared with others - but that’s another realm of photography altogether). Usable doesn’t mean good, but it’s better than a totally black (or white) image. The whole purpose of the exposure end of things is to have what you need to make the final product that reflects what you “saw” and felt in the first place. The development of the image is what gets you to that final product.
Pardon me for the rather lengthy detour. But that is what it’s all about on the technical side of things.
So when we come back from a trip, we’re faced with a lot of images that may be well composed and have a visual interest. But I’ve also mentioned raw files, which is a file type that records (with a corresponding increase in file size) a lot more data during an exposure than when a .jpg f(a different file type) is made. The drawback is that often a raw file will look a bit “flat” as you can see in the image below. This is a split screen image to compare the original raw file (Before) with the final image (or whatever stage you are at in developing the image) (After) that you can use for comparison while you’re working.
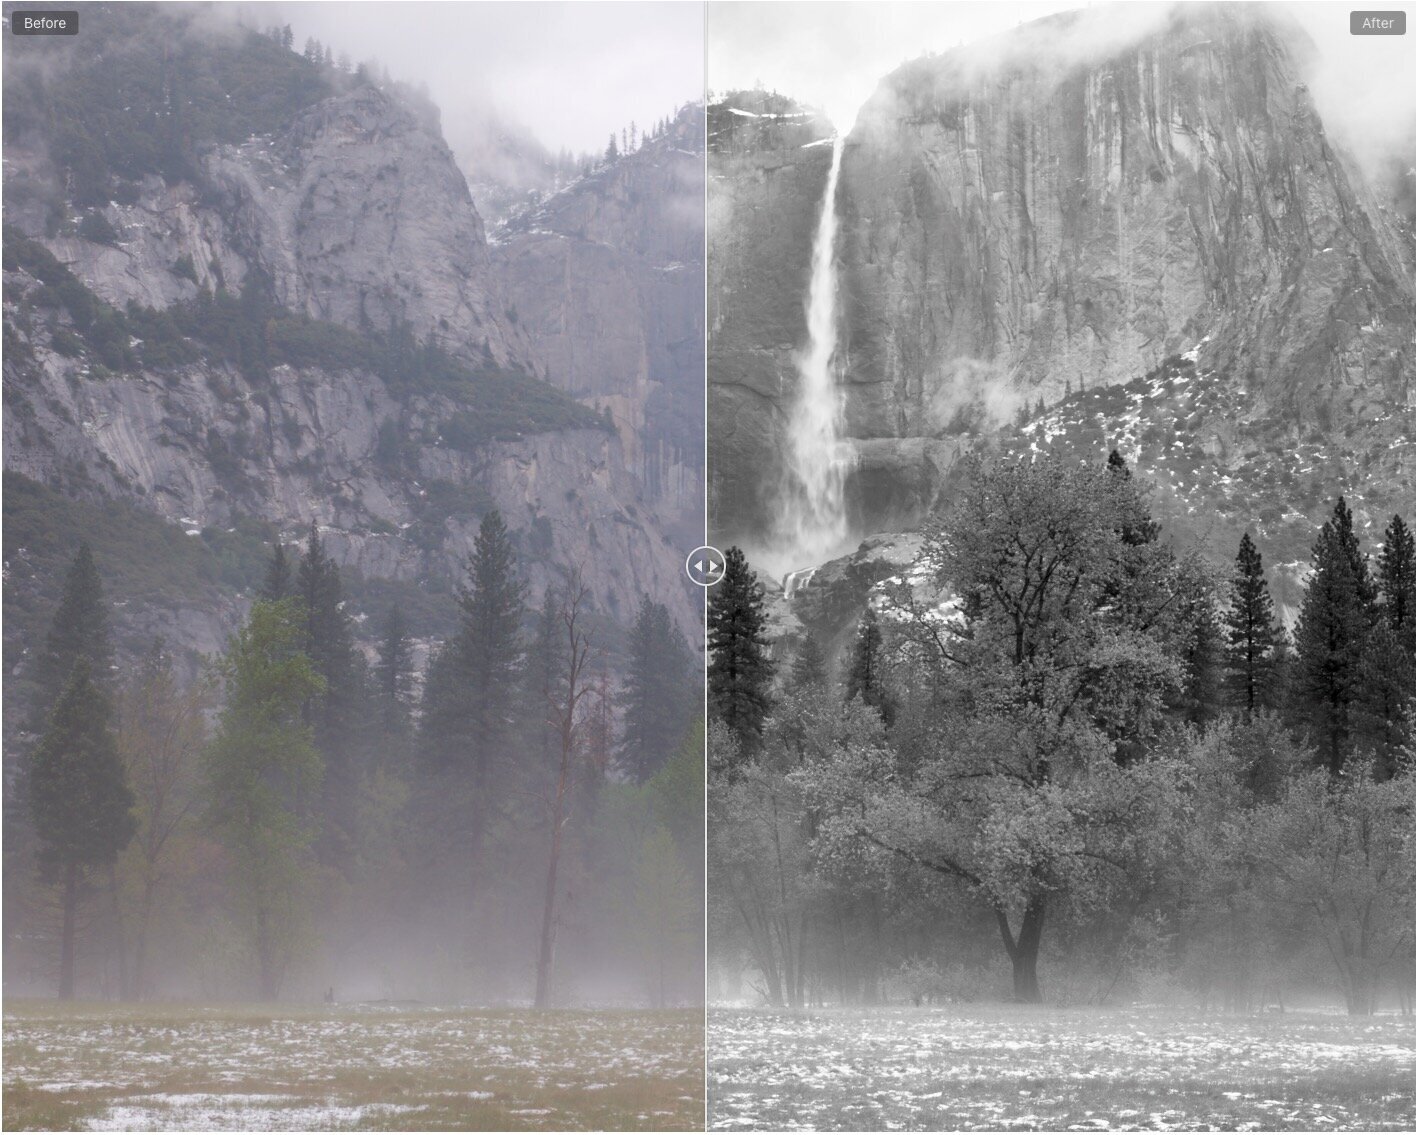
The differences can be significant between the two. Often, it’s because the camera/sensor does not see and record like they eye/retina, and you have to translate what was recorded into what it really looked like, or how you felt when making the image. Generally with raw files blacks are not jet black, whites aren’t white and colors look a bit muted.
So below is the raw file that came out of Ann’s camera. While it was misty that morning (the reason we were so thrilled to be out photographing in Yosemite), it really wasn’t foggy in the way you might imagine from the raw file. That’s not fog in the upper trees, it’s simply a lack of contrast because the sun was behind deep cloud cover.
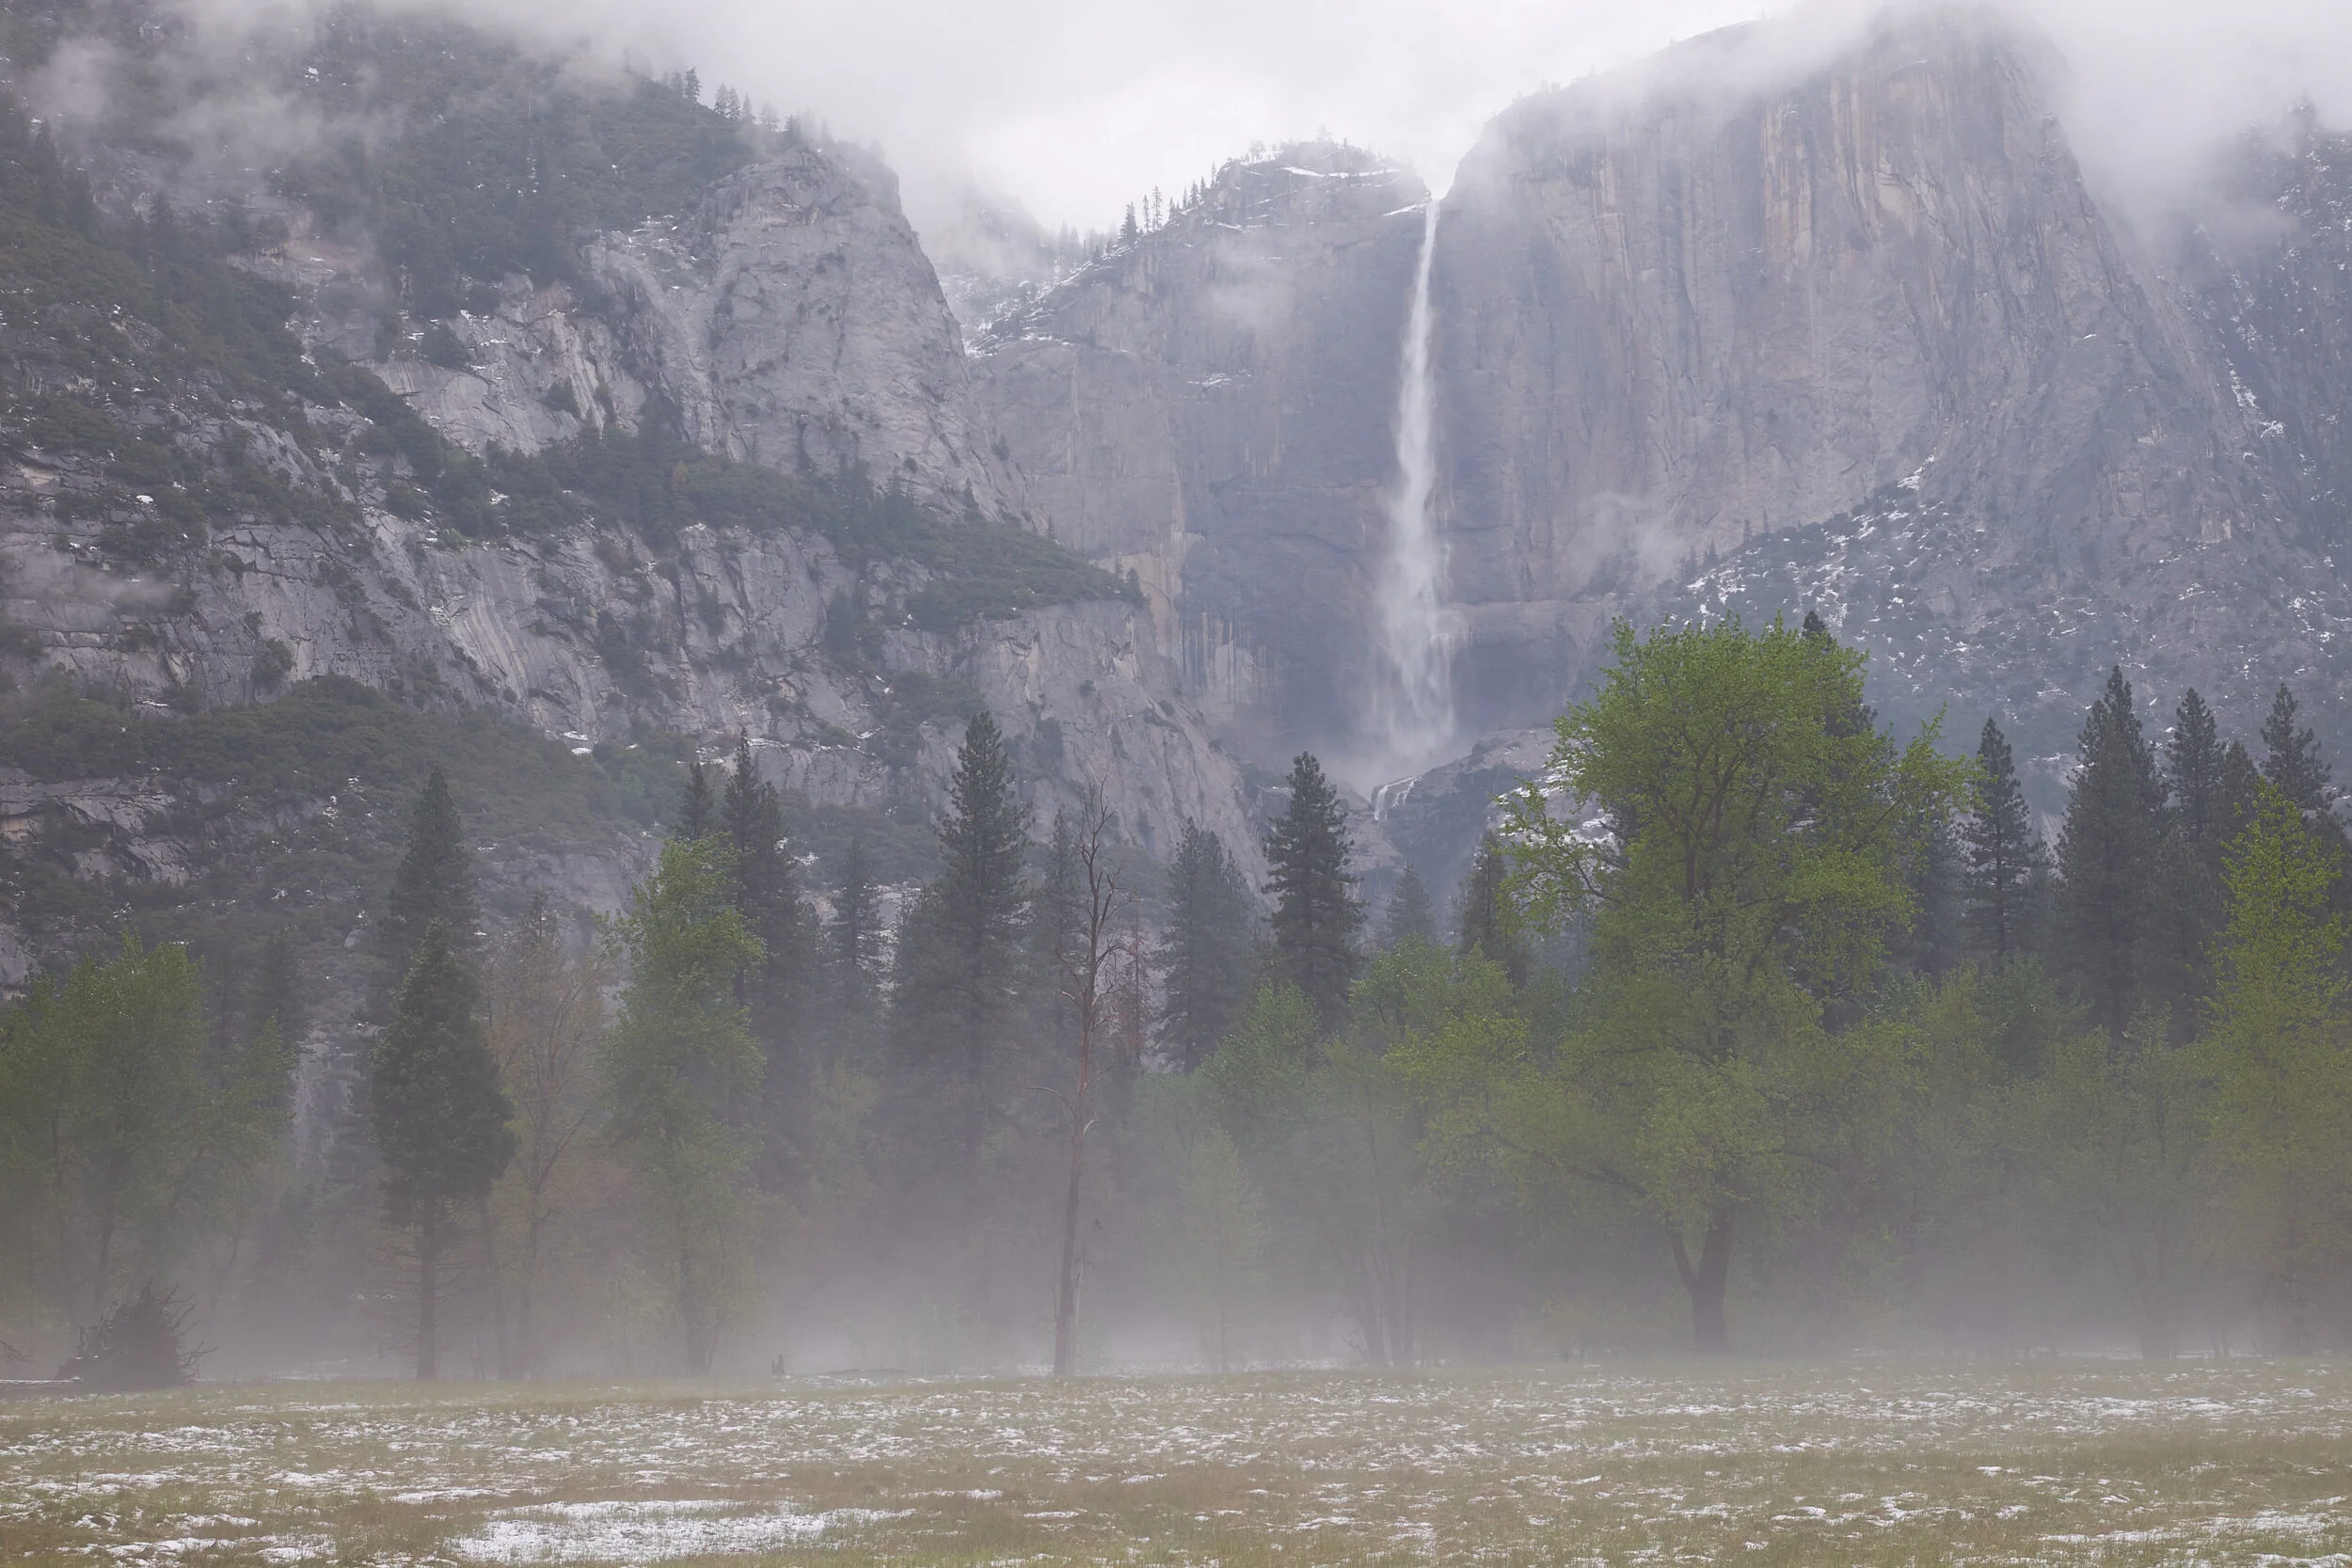
Being there felt definitely more dramatic than the raw file would indicate. (Ann sometimes has her camera record both raw and .jpg files at the same time [.jpg files “bake in” adjustments like contrast and saturation into the image as it gets recorded onto the disk in a way the raw file doesn’t] - I wonder what the out of camera .jpg looks like?). So the issue is how to develop the image from what was recorded on disk to the final image.
That’s the “development” process. Here, the issue is how do you use the tools at your disposal to recreate that sense of awe with the mist hovering on the ground, crisp air above, and the low-lying clouds wrapping around the outcroppings of the valley’s granite walls? How do you recreate, in a still photograph, the sound of the waterfall and the energy and power it conveys?
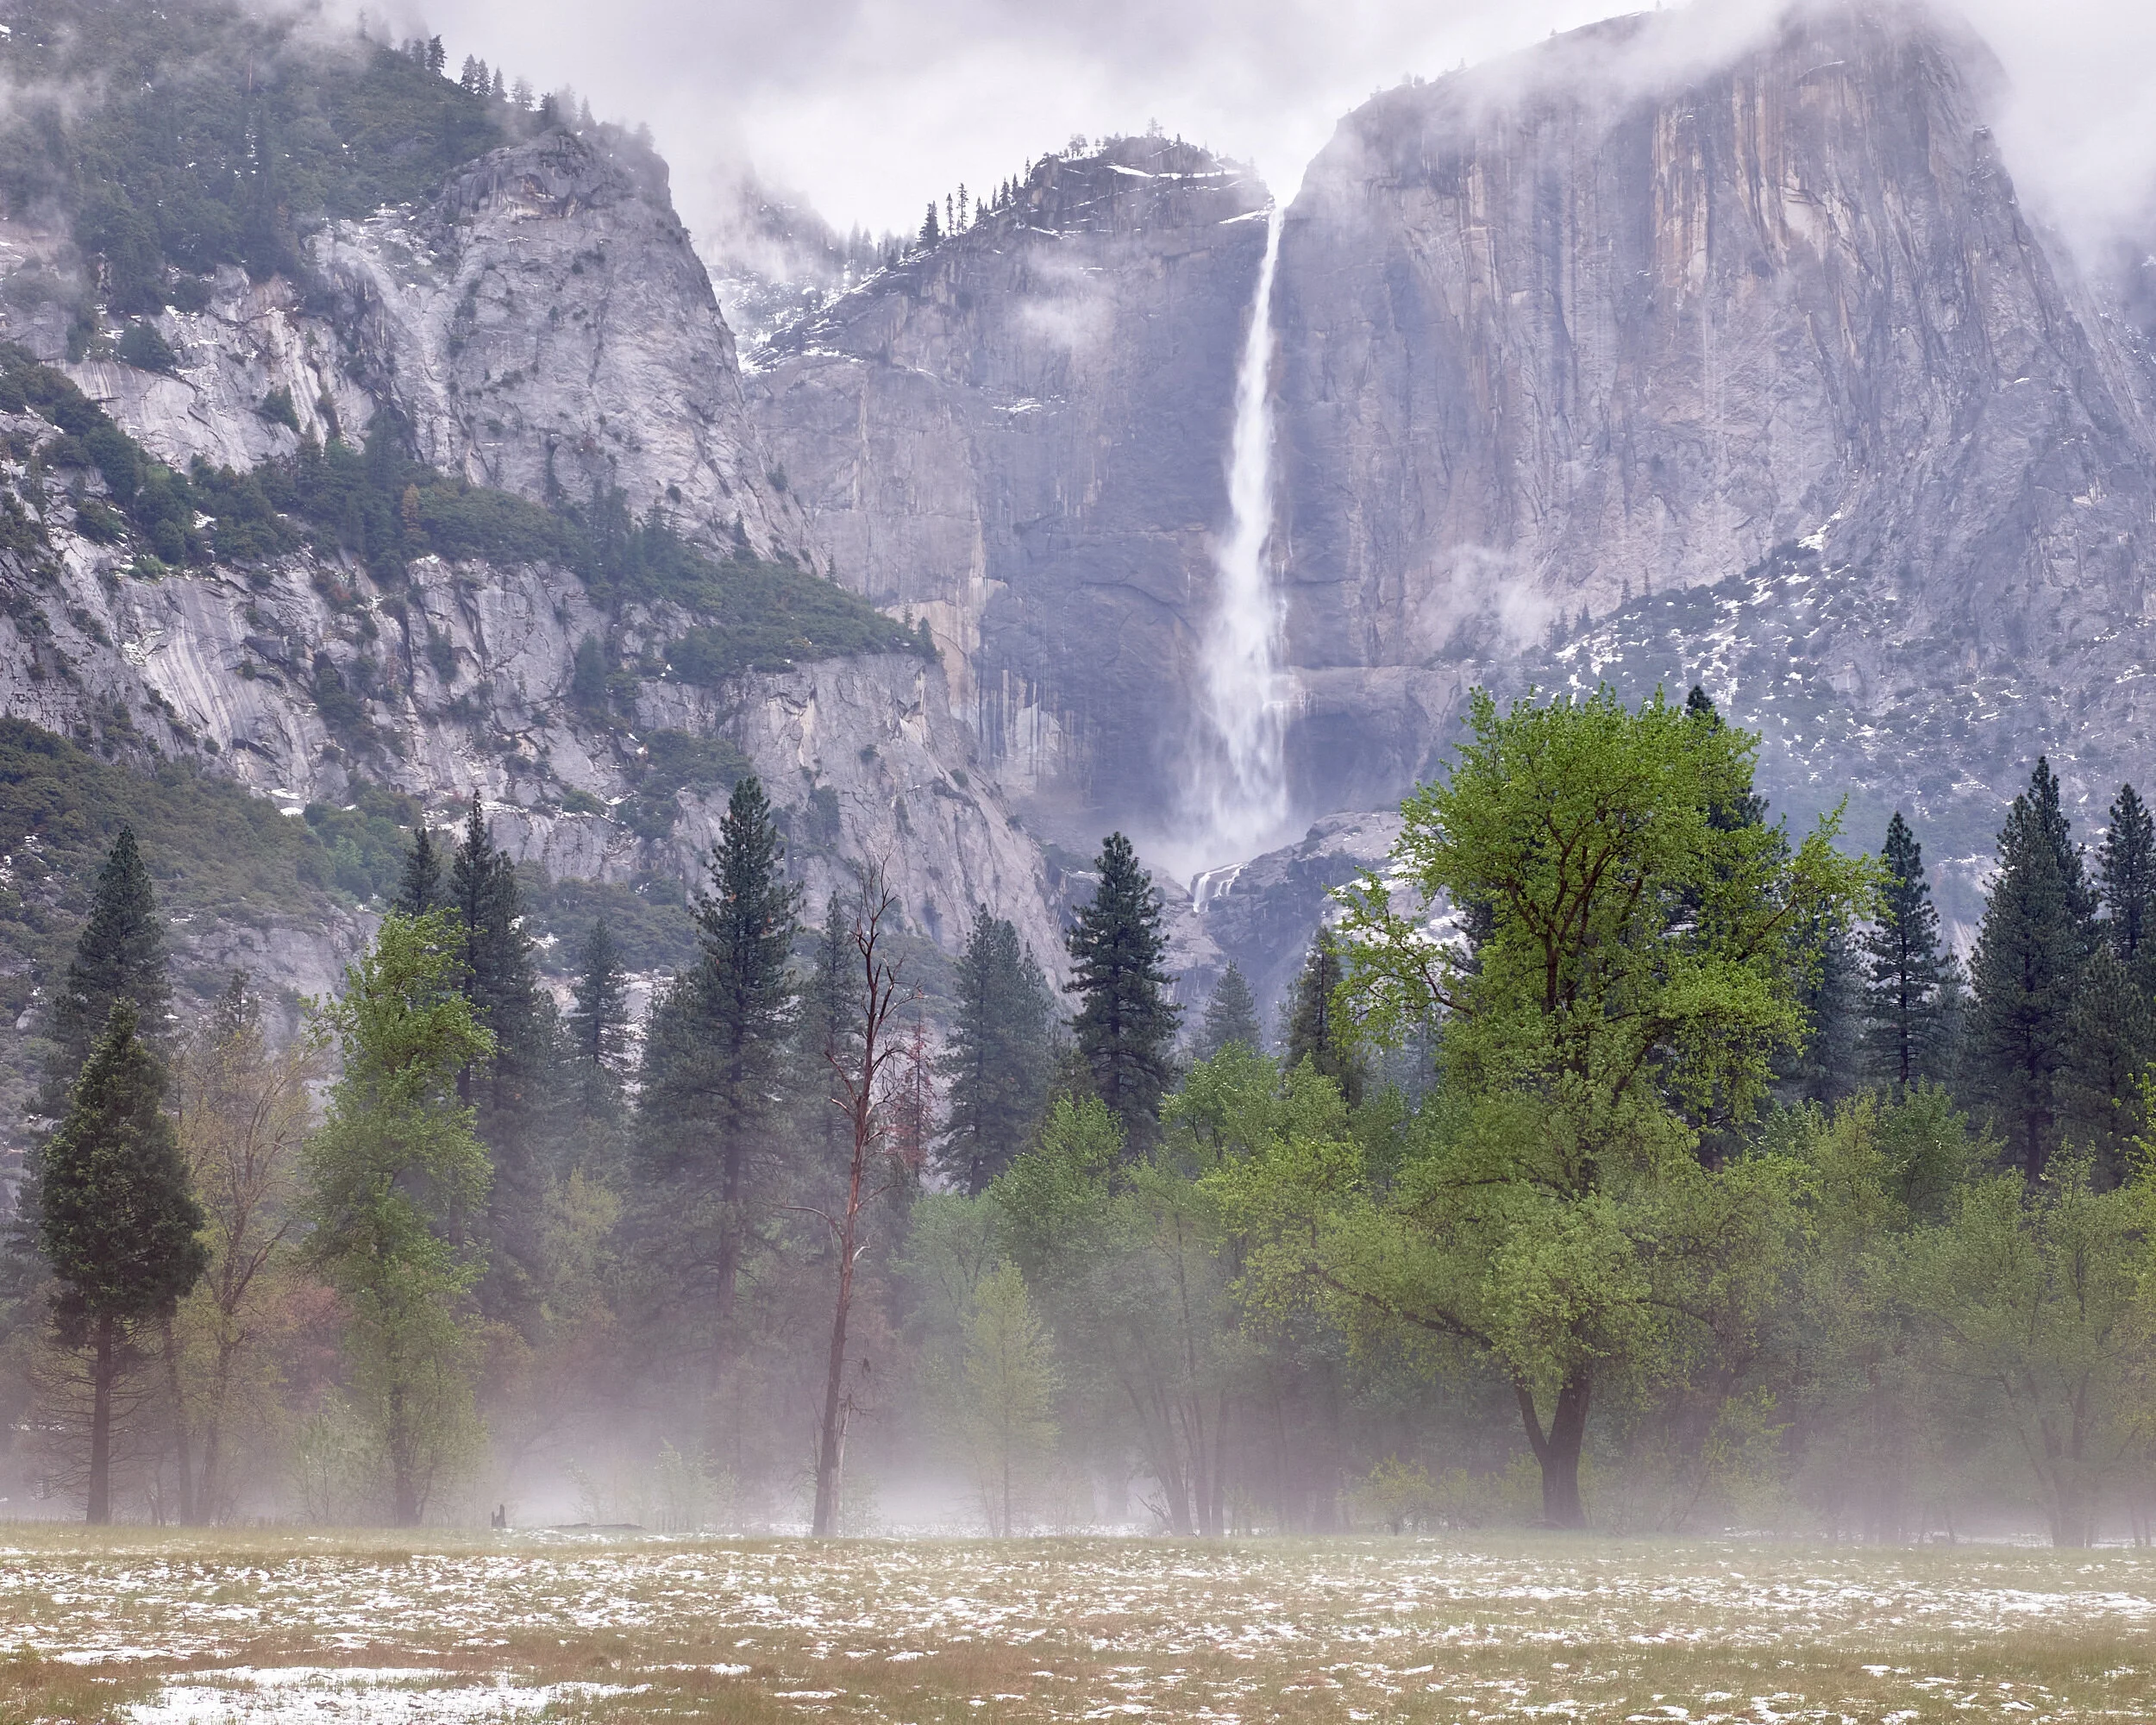
One of the tools is by cropping. If you’ve looked carefully, you’ll see that not only has Ann returned the contrast in the scene to more closely resemble what we actually saw, she has cropped the image in a way that brings your attention to the trees in the foreground and the waterfall in the background.
Many of the tools we use resemble wet darkroom tools. We burn (add enlarger light to darken parts of the image) and dodge (block enlarger light to lighten parts of the image), and do it in various ways with tools - brushes and radial filters - that recreate the physical tools (read: pieces of opaque paper taped on thin metal wands, or holes cut into firm cardboard) I had made when I was printing under an enlarger. Others, like contrast, we controlled by changing the contrast of the paper we used, or by using different developer combinations. Other things we use to develop images - like clarity and structure - are largely unique to the digital world, especially in the very refined and isolated way we can use them on the computer. Different films and developer combinations could give you something that resembles what clarity give you on the computer, but you were stuck with that “clarity” (accutance) for the entire negative, which is not the case with the digital darkroom. Of course you can add clarity to the entire image if you want to; or you can be more judicious in its use and add clarity only to a tree that you want the eye to go to.
Although there are differences between film and digital, the goal is really the same - know your tools so you can take the image you made out in the field and develop it in the manner you envisioned when you were making the image.
And, of course, another advantage in our digital age is that you can convert from color to black and white with the checking of a box, and can even control the tonal values of particular “colors” in your black and white “negative” (again something you could do in the film days with filters, but only by exposing the entire negative).
But of course things are never as simple as checking a box. You very quickly learn that simply converting an image from color to black and white is usually not very gratifying. Which means you need to hone your black and white development skills just as much as your color development skills. And work at it. A lot.
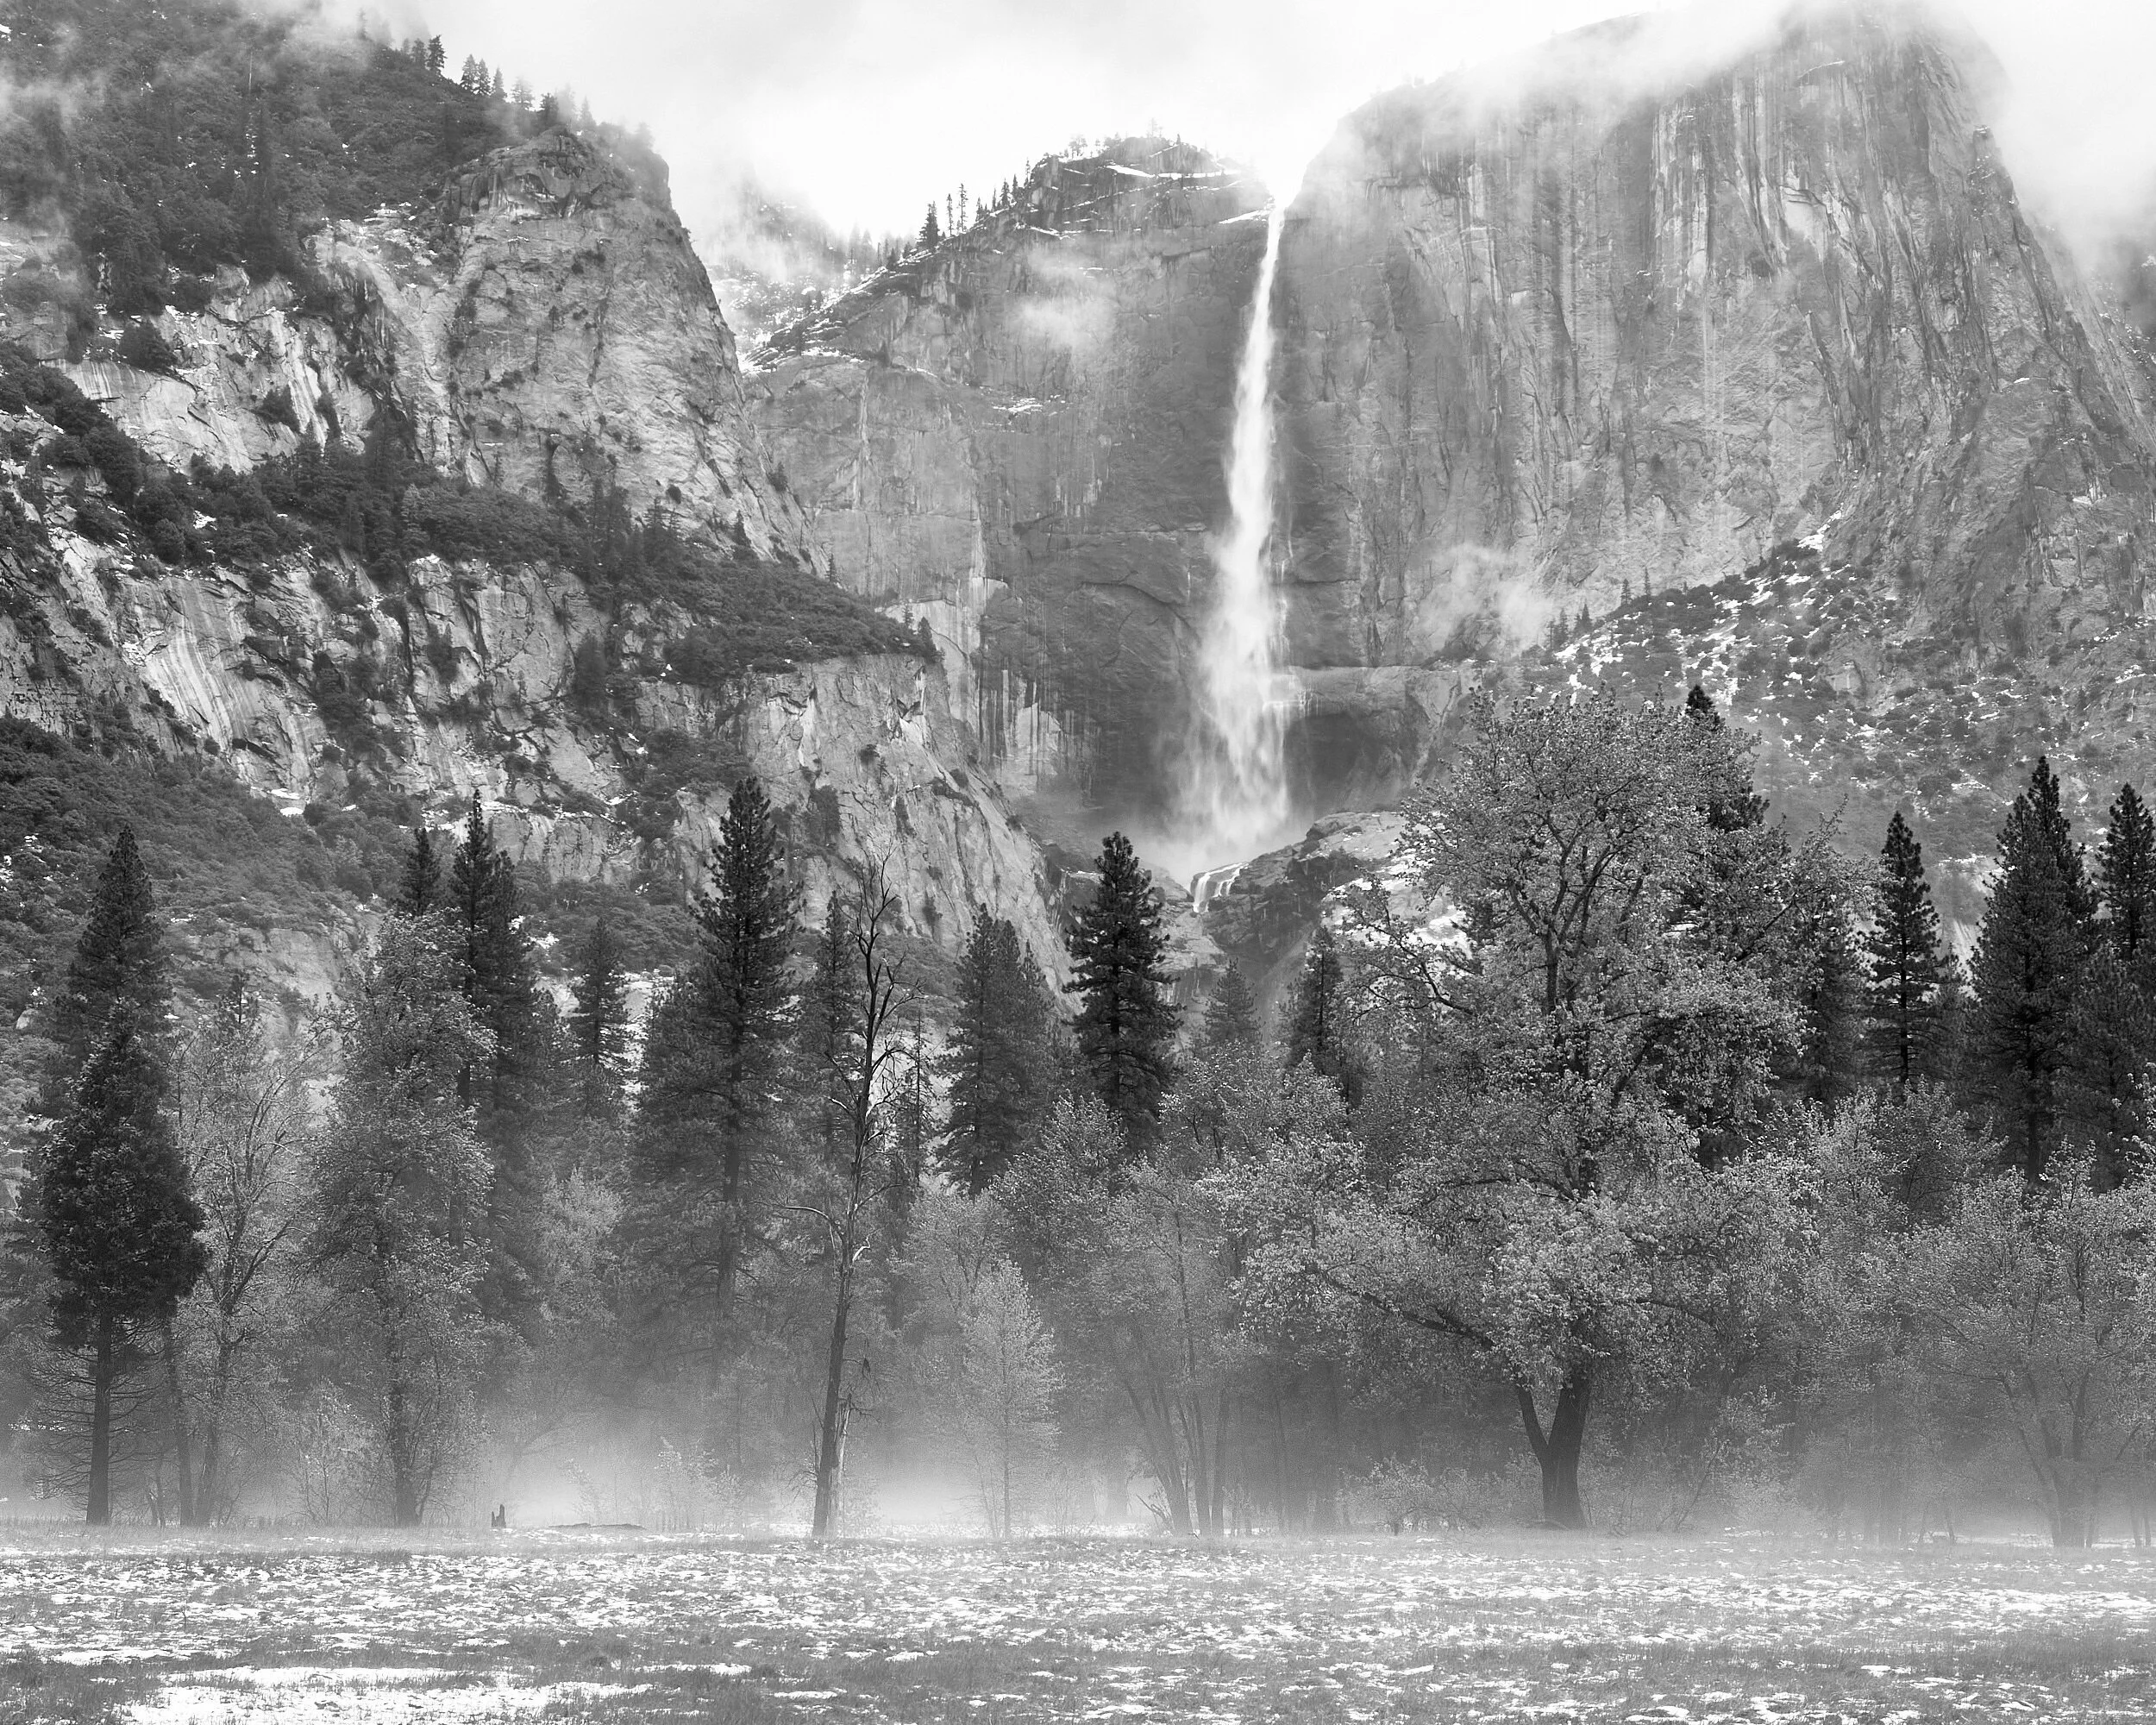
Looking at the above images, I’d say Ann is getting pretty good at developing her images.